
I found Ready to Sew patterns (from France) a year ago on Instagram, in a post that likely featured a hashtag I was following (as I tell clients, Instagram is a discovery platform.) The French designer has a lovely collection of patterns with unique details. I purchased the Pleat pants pattern, the Pio pants pattern (a dead ringer for a pair of Jcrew linen joggers featured on their site in the summer of 2022) and the Josette top and dress.
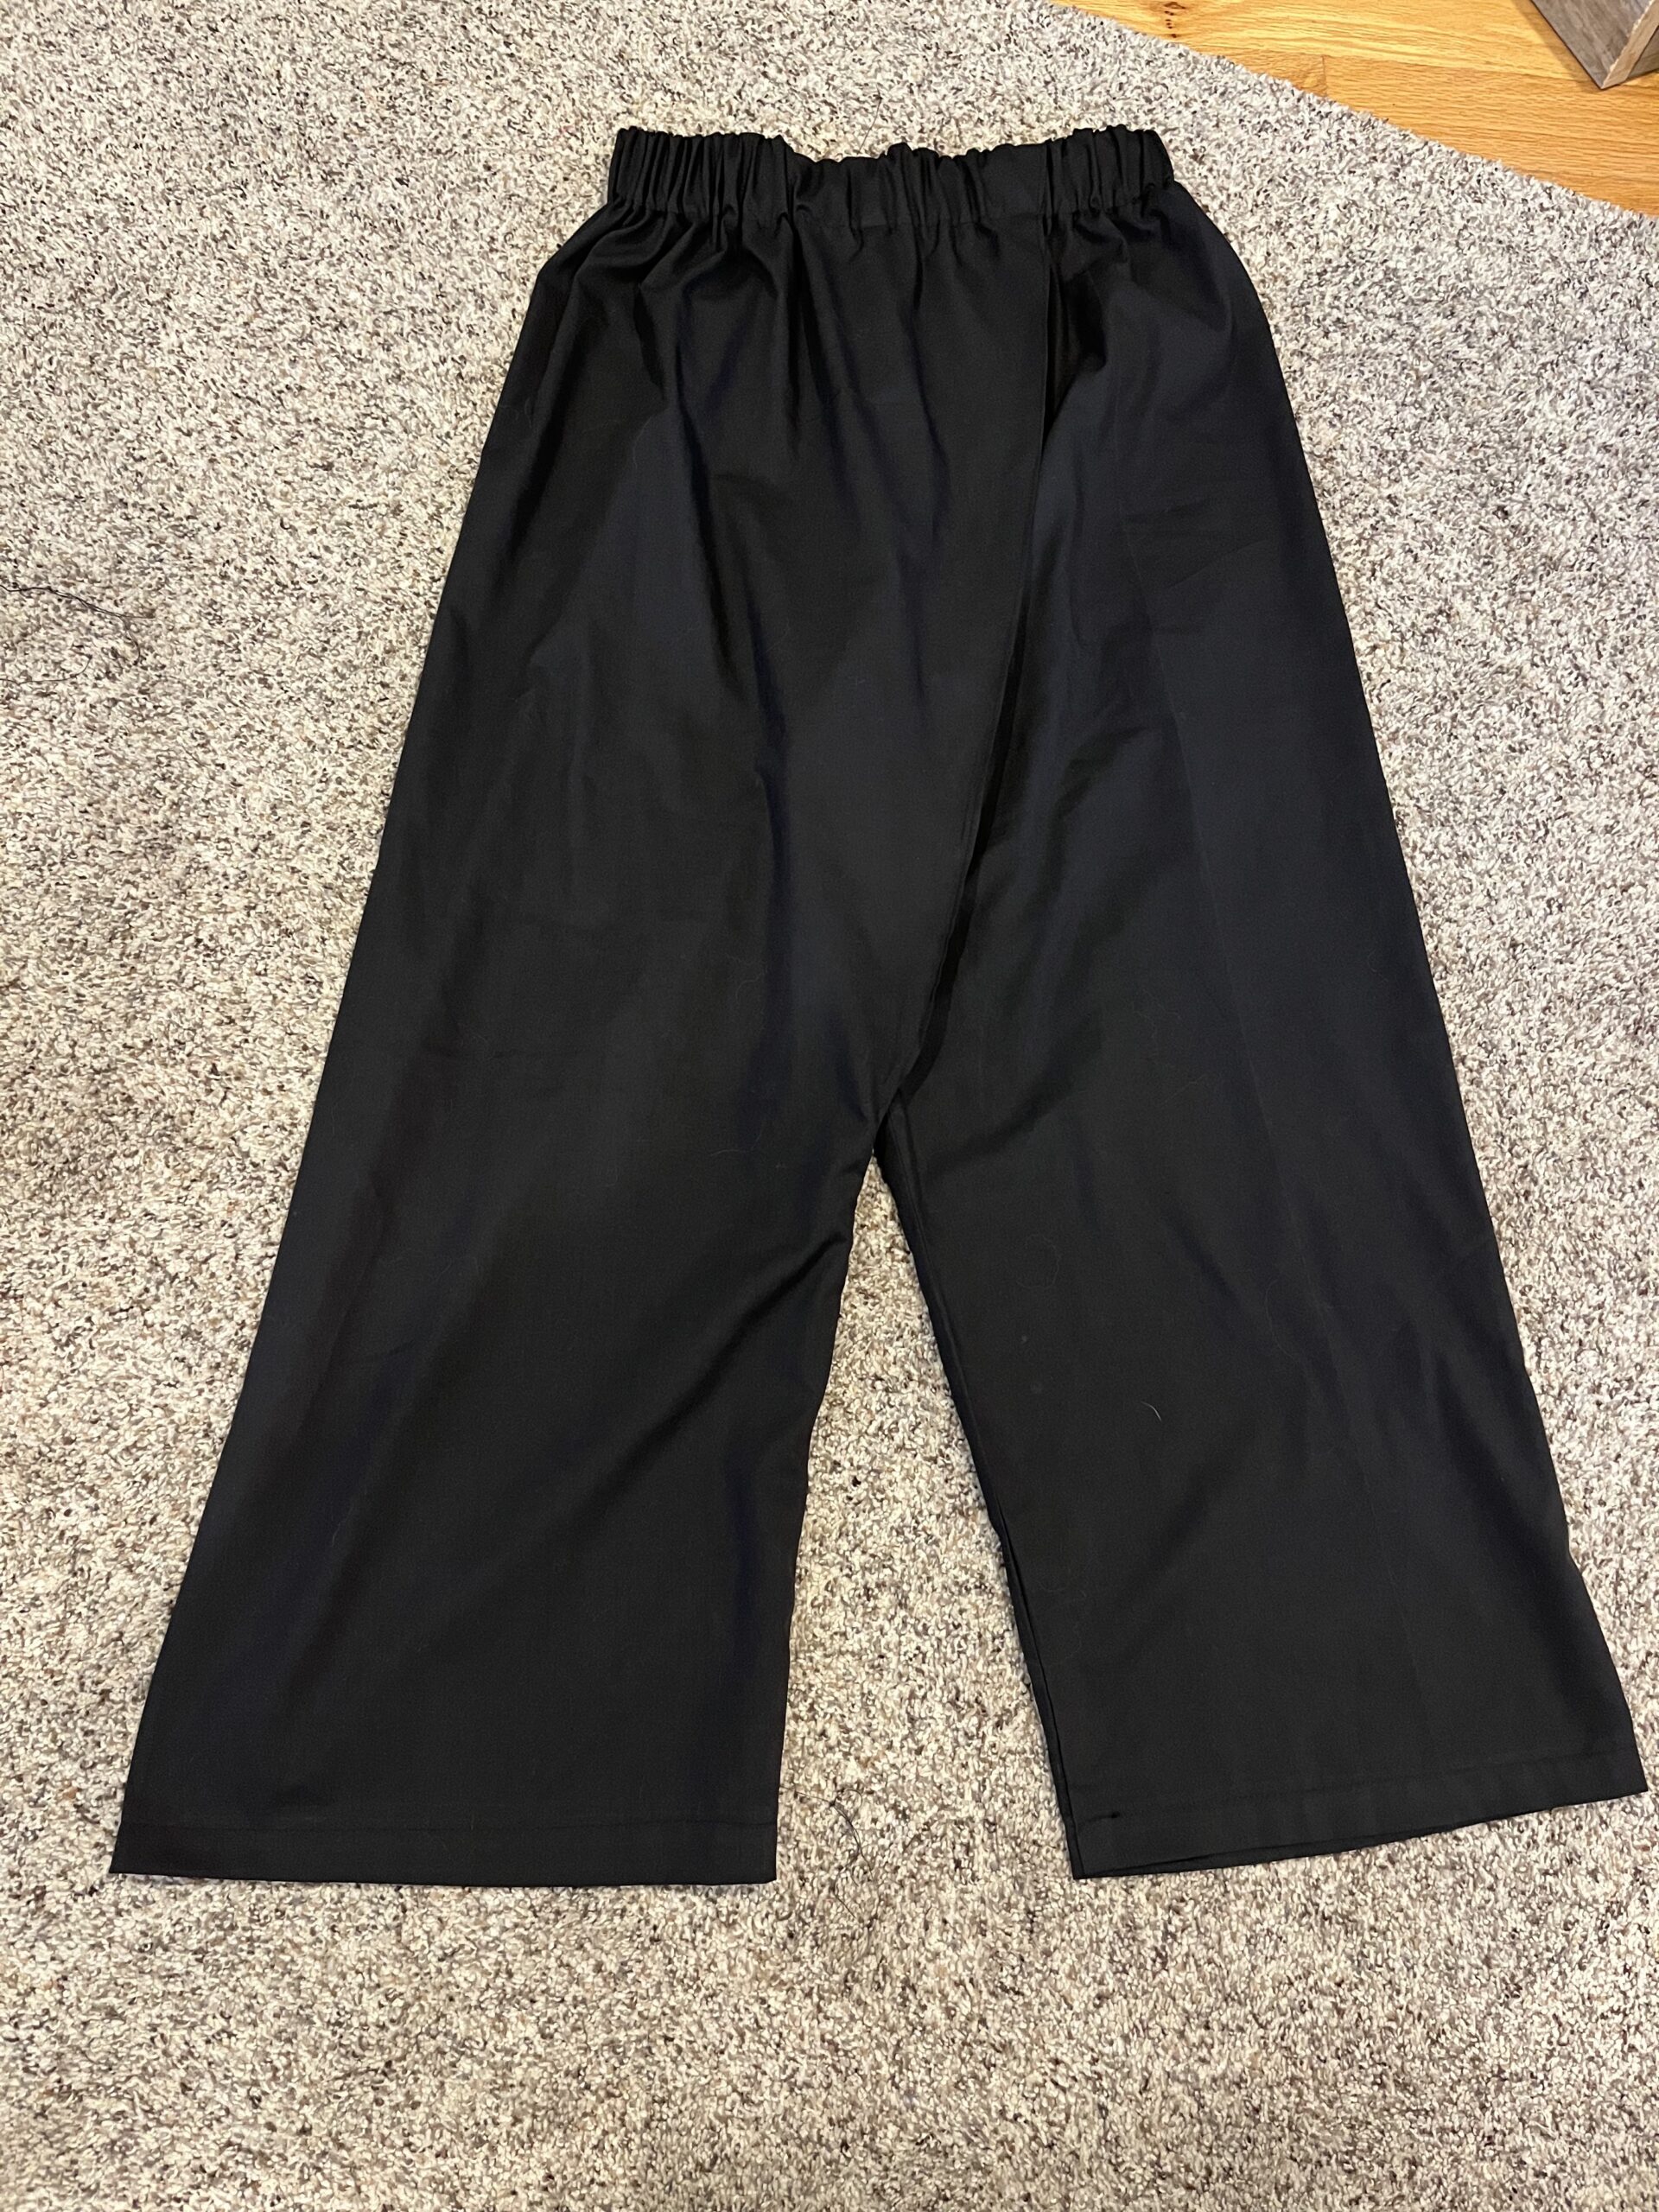
The Pleat pants are a wider, elastic waist variation of their other foldover pants pattern the Papao, both of which are based on a Thai fisherman style pant. The Pleat has wider legs, slightly cropped, with an elastic waist. I sewed a 46 (I said 44 in another review, but I think they’re 46) European size. I could go down to a 44 no problem, plenty of ease in these and the fit lines are not that far apart.
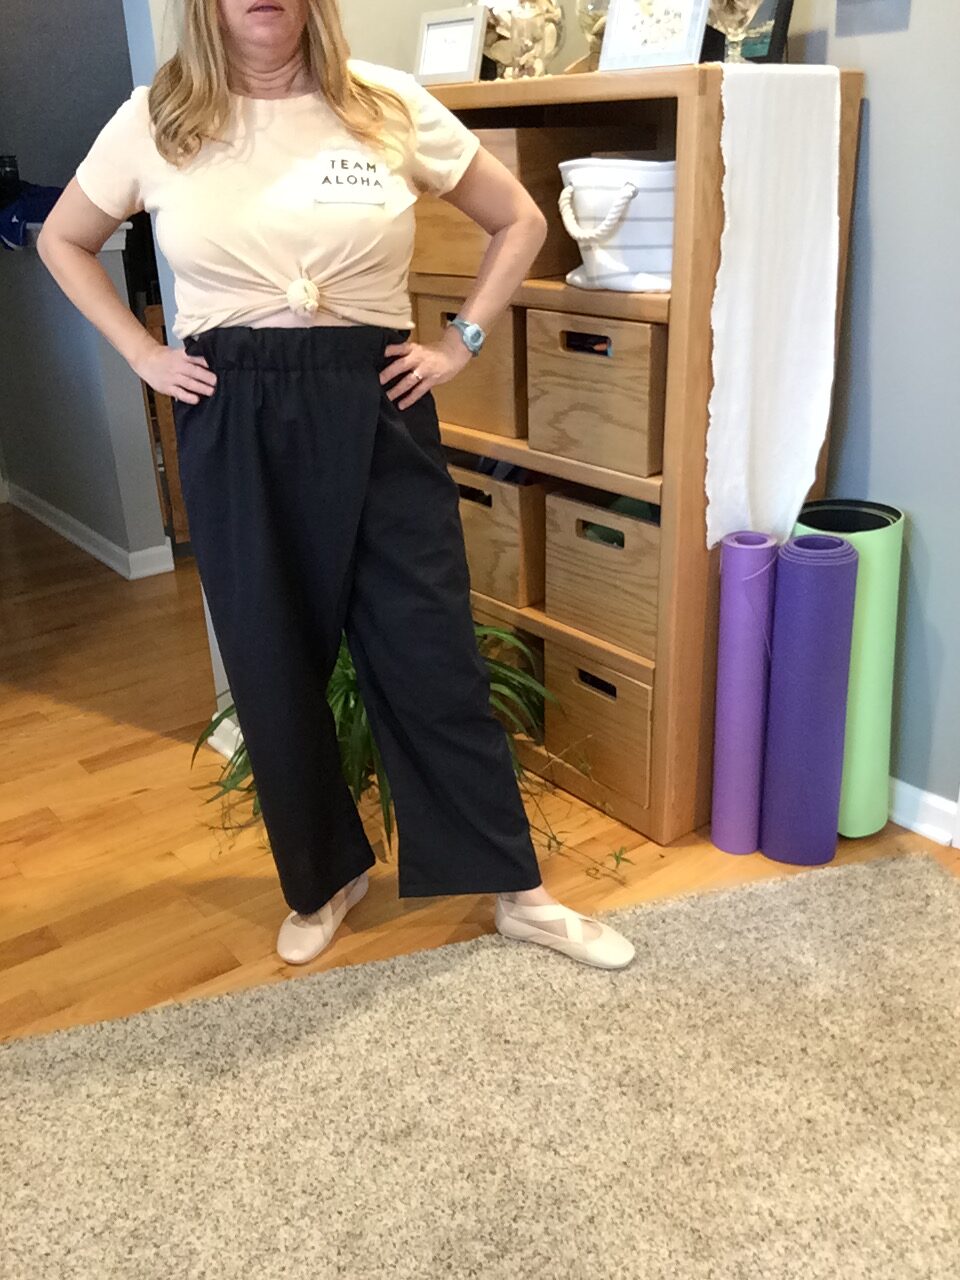
First off, I highly recommend making these pants in a tester fabric (muslin, or just an inexpensive fabric) to test out the fit and how to construct them. I did this myself with some stash black basic cotton fabric that I had yards and yards of (likely from JoAnn fabrics, it’s been down there in stash a while.) This fabric is lightweight, and you can use light or medium weight for these pants, but NOT something drapey like tencel or rayon. The Pleats themselves are topstitched for stability and the pants would drape too much in a filmier fabric.
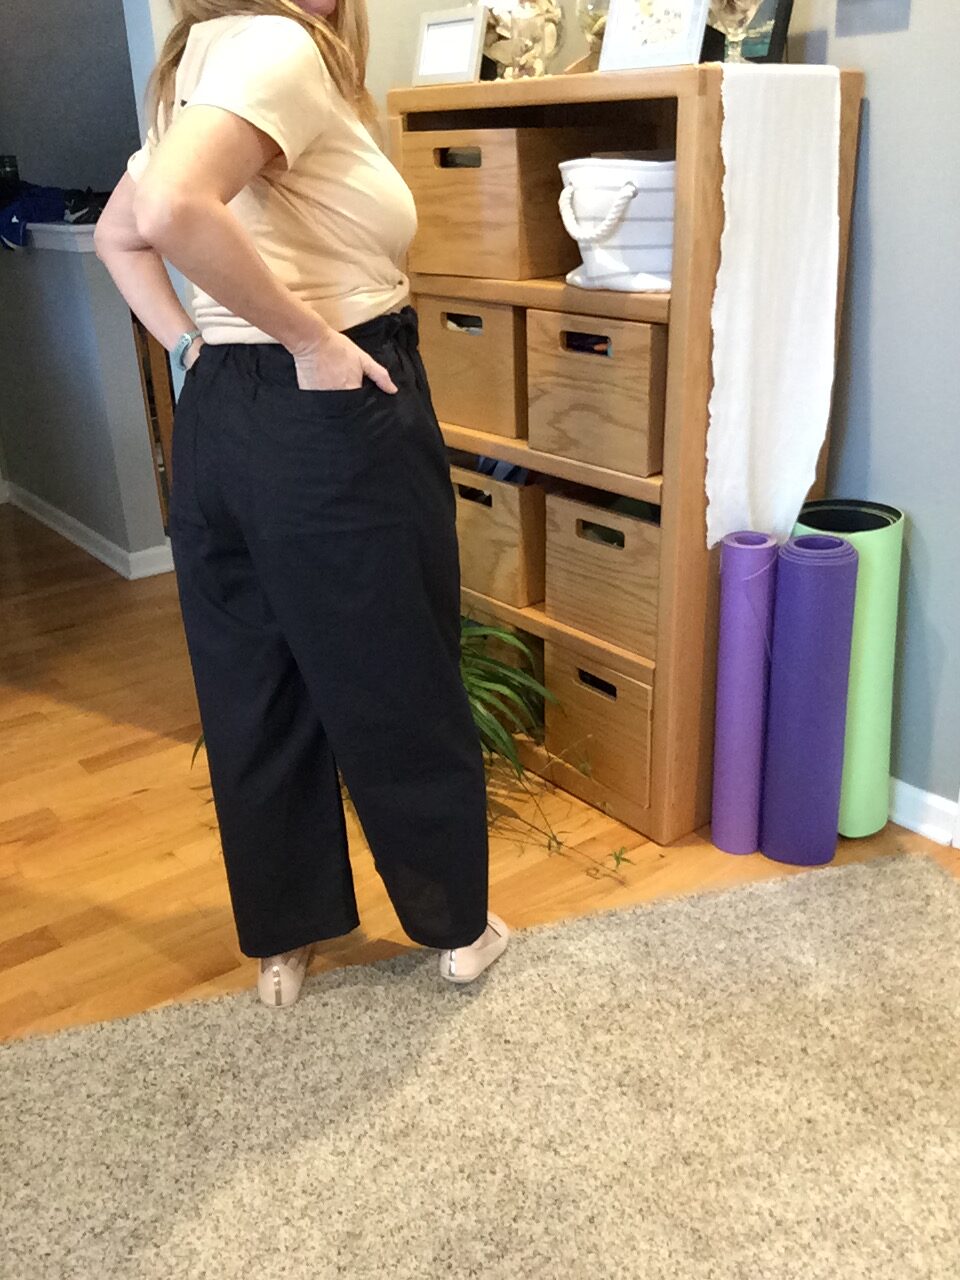
And I also recommend that you read ALL the instructions before cutting out! I did not do this, and I ended up cutting, marking and sewing darts before I realized that these were cut single right side up (they are cut single, as the pants are a no-side-seam pant). So my pleat is backwards – this isn’t a problem, they are just mirrored. Because they’re cut RSU the markings on the patterns are on the top (right) side. I will transfer these markings to the back side of the garment when I sew them next time. If you use a washable marking pencil, this is fine. It’ll actually steam right out with your iron as you sew the pants.
I also realized when I looked again at the model (the waistband is wide) and then the instructions that the waistband is folded to the inside. You’ll just need one of them. So, there, too, READ THE INSTRUCTIONS FIRST. LOL. Fortunately I read them before I actually sewed the waistband.
A test garment allows you to make these mistakes!
The construction is straightforward, with a few interesting details for those pleats. Follow the linked tutorial videos in the instructions (I sew with my iPad so I can easily do this). One aspect of these that I love is that the designer compensates for some stretch on the bias you’ll get from the front side (pleat side) when constructing the crotch seam and has already accommodated for this in the lengths of the back and front inner leg seams. Those kind of drafting details are really nice, and show a level of care that is a level up.
If you’re a first time beginner, these are approachable with the videos so don’t shy away from them.
A few things to note: I used a wider elastic than it calls for since I had cut my waistband with the selvedge on one side. This allowed me to recycle an already-cut wide sew-through elastic waistband. It still calls for pretty wide elastic, just not 2″ like I have here. The designer includes several lovely videos of natural dye fabrics for these pants and they would be great hand-dyed or even batiked. Made in some cotton, hand dyed or shibori dyed these would be really awesome with a solid color top.
Wear these with:
A slim fitting top., tucked turtleneck or slightly cropped sweatshirt style top. A few to consider for winter: Nikko by True Bias, Toaster 1 by Sew House 7, the Mile End sweatshirt by Closet Core. For summer: the Ann Normandy Crop Top or the Foursquare by HotPatterns. Anything slim tucked in OR cropped to just at or below the pants’ waistband. They are high waisted. It says belly button but IMHO they’re higher than that. Pair with ballet flats, or sandals. Roll the hems if you like. For winter, a cozy puffer jacket or cropped faux sherpa jacket would be perfect, along with some ankle booties to show off under the cropped hem.
Will I make these again? Yep, maybe even this same week. I want to do them the correct pleat direction AND use some fabric in my stash (and from my LFS.) They are perfect summer pants, of course, but don’t shy away from making them in a medium weight fabric for fall, winter and spring – they are designed for light to medium weight (even a light weight denim is OK). The structure of the pleat is very interesting. They would make great office/work pants in a lightweight tropical weight wool if you make that sort of thing. I have wool in stash but I reserve it now for casual blazers or toppers because I don’t wear dress pants any more and I don’t dry clean anything. The pattern calls for linen, cotton poplin, lightweight denim. Batik is one of the listed fabrics and I would definitely use some cotton batik. I love two: Androsia and Bahamas Hand Prints, both from the Bahamas (ship from USA/FLL). These would make excellent yoga pants with a crop top. I’m a huge fan of cotton yoga pants these days and I’ve begun a daily practice to keep my body moving and not stiff.
I made ZERO, zero alterations. I didn’t even try them on as I sewed them!