
Trackpants are THE IT garment of fall 2023, and here are some of my favorite sewing patterns for trackpants for fall and winter. I am also going to show you a few hacks, and a couple how-to on attaching the side trim on the pants. The WSJ reports trackpants as the “it” garment of fall -and visiting the Adidas store in Germany this summer (the flagship/factory store), I can attest the three stripes were everywhere (not just in the store, but everywhere!)
The trackpants trend is showing, well, legs! We’re all not really wanting to go back entirely to hard pants, and designers are showing trackpants going out to, well, everywhere! Here are some of my favorite trackpants patterns as well as how to make your own trackpants out of a no-side-seam elastic waist basic pant.
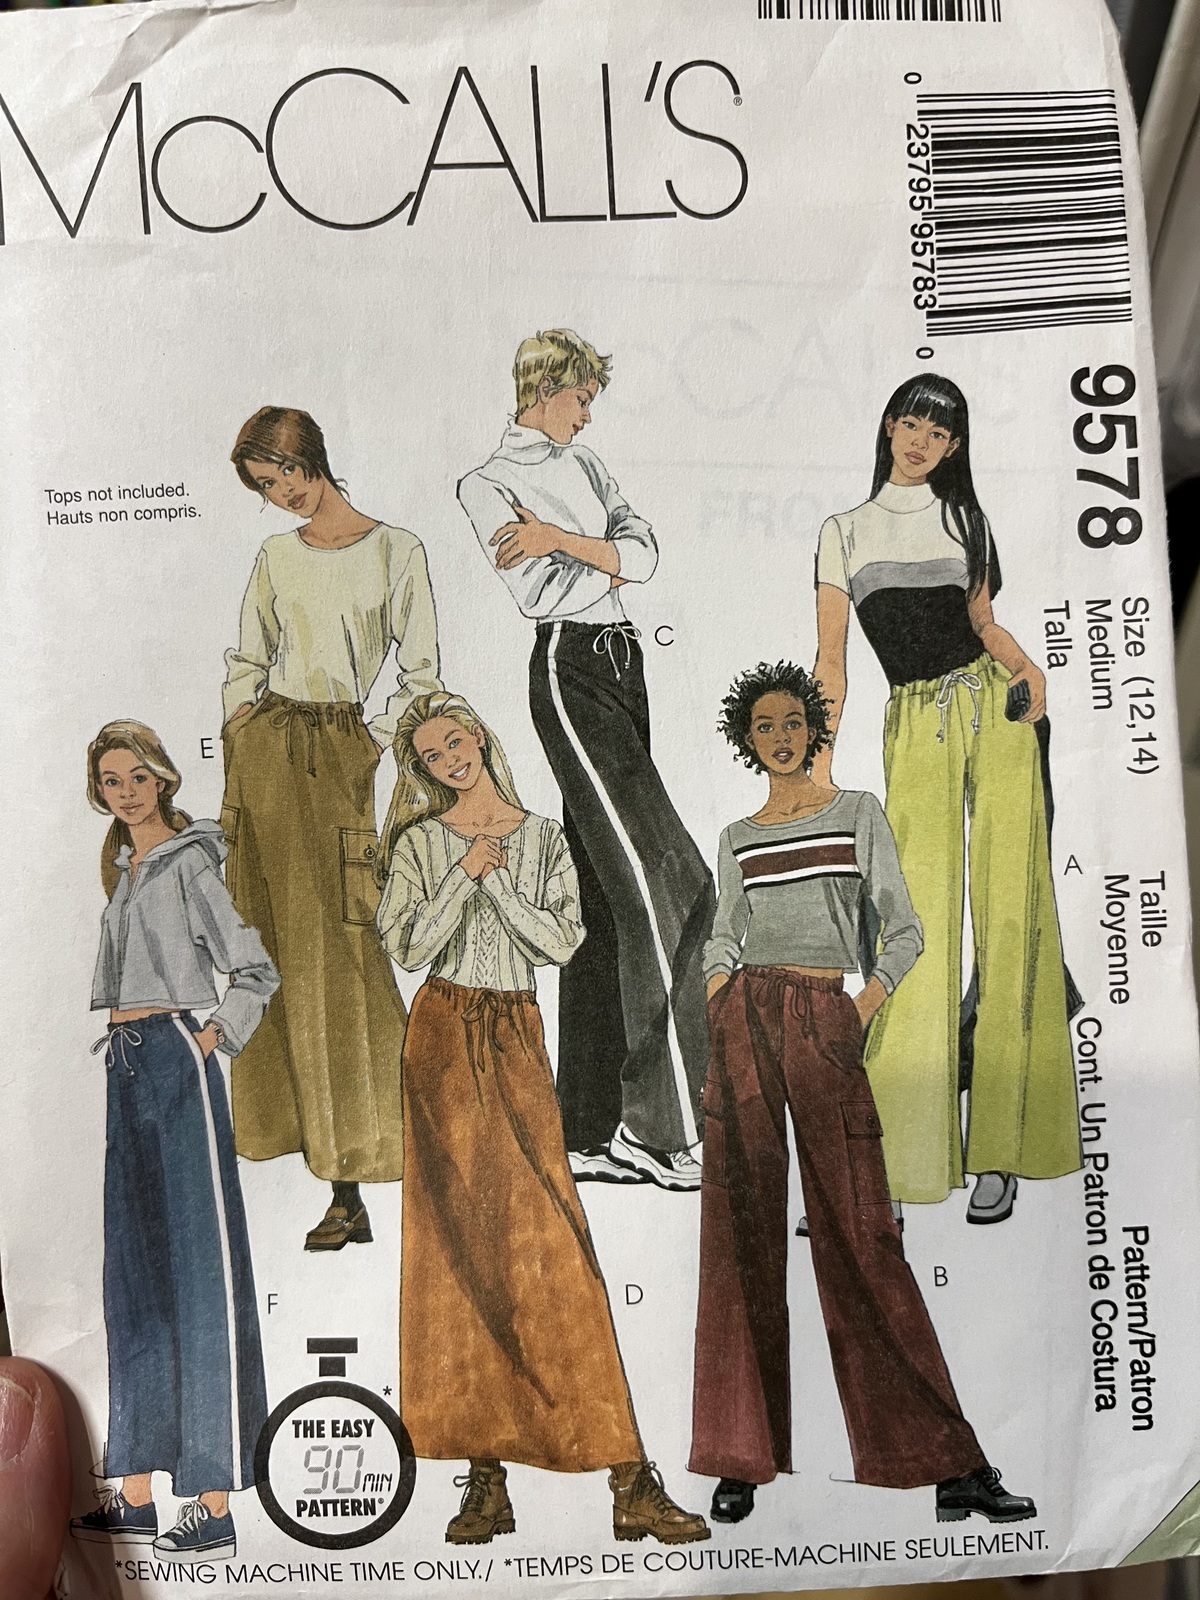
The HotPatterns wide leg trackpant Princess Seam Trackpant is just that – it’s slim fitting at the waist and hip, with elasticated drawstring waist, has princess seams front and back (superb for fitting, especially for those of us with a little booty (or not) and gently flared legs.
Adding side trim to trackpants – you can use the existing sideseam to stitch in a narrow or medium width stripe on the side easily. To do this, you can cut a 1.5″ wide strip of knit fabric and lay it wrong side of the trim to the right side of the pant back leg, so the raw edge of the trim and pant are even. Baste at 1/4″ (inside the seam allowance). Now, top stitch along the raw edge of the trim to secure it to the pants. Knits do not ravel, but you can, if you want, turn and press the edge and secure with fusible web and then topstitch as well. If you’re using a second, narrower layer of trim, apply it on top, again, same way. If you’re using a side seam pant, I’ve also seen the trim span the pocket, where one stripe is on the front of the pocket (front leg) and the other stripes are on the back side of the pant.
Easy Side Stripes for Trackpants
Sew with a basic elastic waist pant sewing pattern with no sideseam for less bulk and more design options. Options include the Shivano Pant from Sew News, or try these wide leg pants from Ukranian Designer Dudas Patterns called the Paula Set (I have this one). Or go vintage with this one (I have this one!) If your pant is slightly tapered at the ankle, you can widen it from knee to hem just by placing a ruler at the knee and drawing it to the hem on both inner and outer legs of both pattern pieces.
If you do not have a no-side-seam pant pattern, you can take your favorite elastic waist pant pattern and make one! Lay the back pattern piece face down, and the front pattern piece face up so the crotch points face opposite directions. Align the waistband at the side seam so the top edges and bottom edges match. Overlap the pattern pieces by 5/8″ and pin a couple times to keep them together along the leg. Trace the new one-piece pattern all the way around so you have a back crotch on one side a front on the other, and the wide pant leg between. Then, apply the trim as above. Note, no-side-seam pants do not have inseam pockets (there is no seam any more!) but you can add cargo pockets or back pockets for your phone.
Cut your trim strips. Mark the sideseam of the pant at the waist with a small clip notch, and side seam at the hem with a small clipped notch so you have a long length along the leg to lay your trim. Lay your trim down and secure the edges with Steam A Seam before stitching. Apply a second layer (narrower) of trim on top. You can use fabric strips, twill tape, bias tape or even ribbon or other purchased fancy trim! If you’re using a woven fabric for your pants, you can use prepurchased single or double fold bias tape for your trims, you can make your own (printed! striped!) bias tape too, or use narrow twill tape. Securing it (fusing) with Steam A Seam means the trim will be fastened on before stitching, making it easier to sew than securing the trim sewing with pins. Stitch close to the outer edges of your trim after you secure it with fusible Steam a Seam. After you finish each leg’s side seam trim, you can add a cargo pocket to your trackpants so you have a place for your phone. Back patch pockets are also a great option, and you can add those now too if you want.
You can add trim to pants with pockets too – usually the trim goes on the FRONT of the pants, and is sewn in place before you sew on the side seam pockets. If you have wide trim, or more than one strip of trim, you may want to incorporate a panel on the side seam of the pant or place some of the trim on the back sideseam of the pant as well.
I also have this one, that incorporates trim on the sideseam too: Often these are available on Ebay or Etsy.
Sew your trackpants the way the pattern describes! Done!
Sewing Workshop out of KS has a great video on Trackpants with an inspiration slideshow.
Styling Trackpants for Fall and Winter:
Of course you can wear them with a hoodie, but also try them with a funnelneck sweater (the Paula Set mentioned above has this included in the pattern), with a fleece bomber jacket, a cashmere sweater, a tee and a blazer, an upscale asymmetrical jacket or a moto jacket.
They look great with your sneakers, but also you can wear them with ballet flats, sporty ankle booties or lug sole loafers, a Chelsea style boot. The pattern above, from the 1990s is a classic look for today, too!