
The “paperbag” style elasticated drawstring waistband is super popular right now. And it’s a SUPER easy hack too!
- Any elastic waistband skirt or pant pattern.
- A ruler
- Some tracing or large-format paper (even newspaper will work fine.)
- A pencil/pen/marker
- Fabric marker
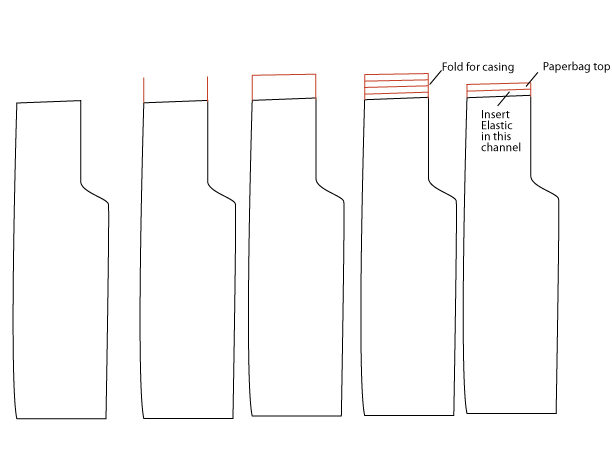
Trace your pant or skirt pattern.
Add a piece of paper under the top of the pattern near the waistband.
Using your ruler, draw up from the sideseam 2″ (this will allow for a 1/2″ ‘paper bag’ at the top, if you want more, add another inch here)
Repeat for the center front seam and the other piece of the front/back of the skirt or pants.
Connect these two new lines with a perpendicular line to create a new, taller waistband.
Sew the pants as directed; when you get to the waistband instructions, follow these instead:
Mark the waistband at 1.25″ from top – this is your fold over line
Fold wrong sides together, and press on this line. This will allow for a casing plus a turn-and-stitch hem for the waistband on the inside.
Follow directions here for making a self-fabric tie plus elastic waistband
Mark and sew a buttonhole on the front of the pants, below the fold line. This is where your drawstring elastic waist will exit. You do not have to do this step if you do not want ties exposed here.
Stitch the folded hem edge of the waistband down, leaving a 1″ gap at center back to insert elastic.
Mark 1/2″ below the top of the folded waistband, and stitch along this line. Do not leave a gap. This is your paperbag part.
Insert elastic into the channel below the paperbag section, try on, adjust and stitch ends of elastic together securely.
Stitch the open section along the center back.
Voila! Trendy paper bag waistband!