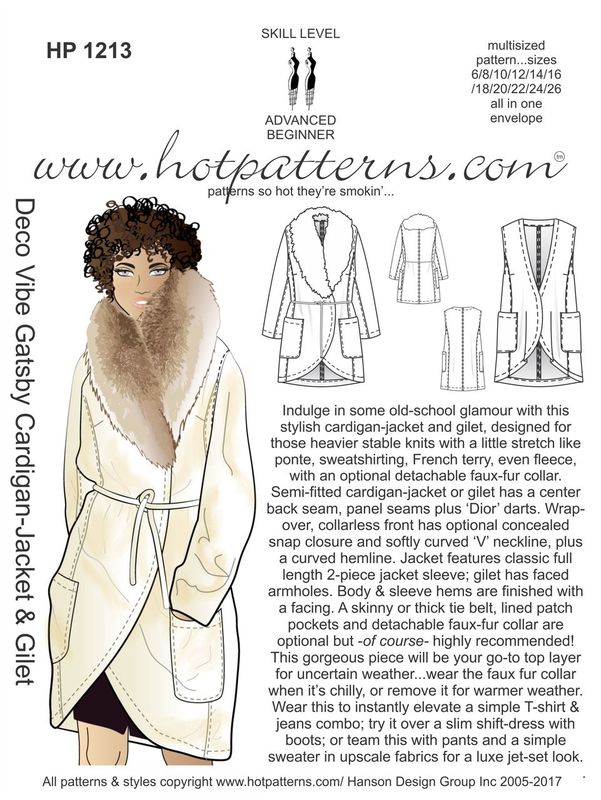
First off, let’s acknowledge that in great British English, a vest is a Gilet, because it sound so much cooler than vest. A vest is what you wear over your athletic clothes, and it’s great, but a gilet, well, that’s a statement piece! And the HotPatterns Gatsby Cardigan and Gilet sewing pattern is fabulous (and fast!)
This pattern has been out for a while (2017 I think) and I’ve had it CUT for a while too, but I finally sewed it and I have some important tips that you’ll want to follow for a great result.
I first made a muslin in print double knit from the 1960s. You know pastel, paisley stretchy, stuff that would have been made into a leisure suit. It was in my stash for muslin making. I added 1.5” to the sleeve length in a size 10 in the cardigan (at the time this was a perfect size for a little slouch, we’ll get to that later.) If you follow the model drawing, the cardi has a bit of slouch to it. Hot Patterns tends to run on the RTW / larger than sewing pattern size so your usual size in RTW might be perfect. I always make a test garment – sometimes in a real but inexpensive fabric and sometimes in a stash fabric (like that 1960s poly) that I won’t use for anything else but is similar to the garment. I don’t actually use “muslin” but that’s what I’m making.
It has some jacket details though – a cocoon shape, with facings that are shaped (so the cocoon won’t pull inward as is typical with a rectangular band sewn on), a shaped, a two-piece sleeve with faced sleeve hem. They aren’t complicated at all, but add a nice level of jacket polish to an otherwise super comfortable almost bathrobe-comfortable piece.
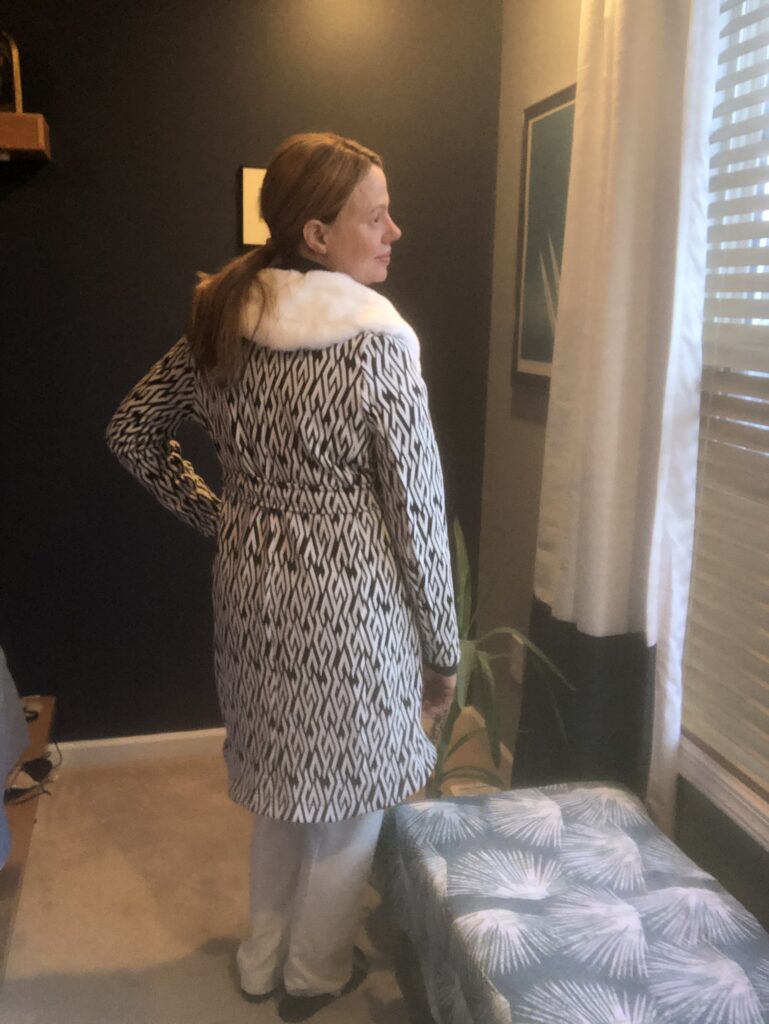
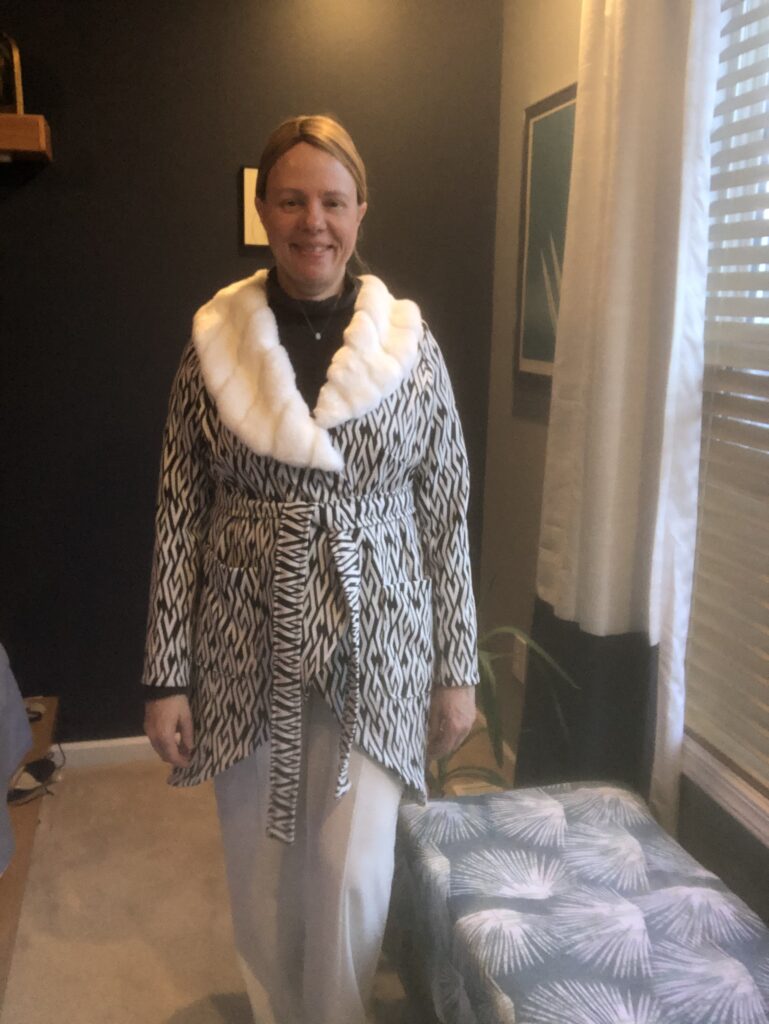
The pattern comes with a narrow belt or a wide one. I chose the wider one and I applied this at my ribcage level. Maybe it’s all those years watching What Not to Wear, but I know for certain that the narrowest part of ME right now is just below my ribcage! So where I tie it is at my narrowest spot, which is above my waistline. I used thread chain loops on the back of the paneled seams. I might replace this with narrow black ribbon later.
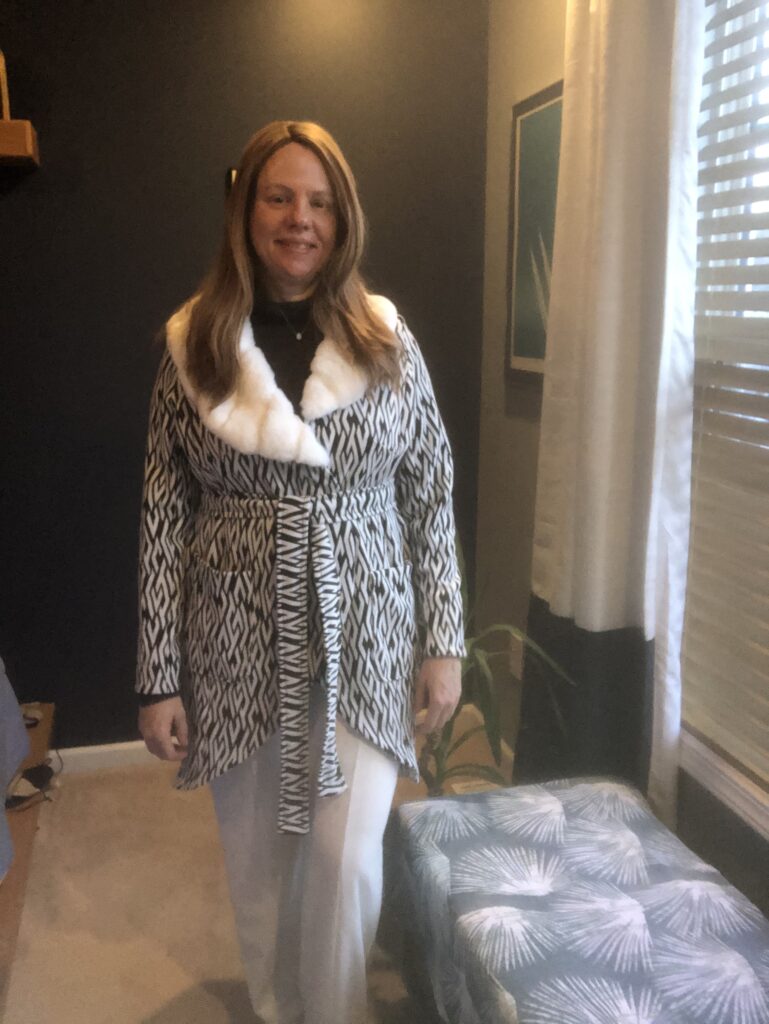
As I said, I cut this in 2017, intending to wear it to Sewing in the Sun. HotPatterns hosted this four day sewing retreat in Sarasota, Florida in January for several years running. But of course, time got the best of me and I never finished it. It languished in my UFO bin until I pulled out this black and white (ALSO doubleknit!) print that I picked up at Haberman Fabrics in Clawson, MI. This stretchy, yet stable knit is perfect for this cardi. The fur is from my stash, probably 15 years old. I’ve made pillow covers and my kids have cut up their own “bedroom rugs” (eep!) from it, pilfering more and more of it for craft projects, LOL. I managed to snag enough for the collar. The lining for the collar is standard poly lining, also from stash.
Tip #1: stabilize the band stretch. I did not interface these but if I sew it again, I will use non-stretch interfacing on the bands to keep them from stretching while sewing. This is in the instructions. I chose to ignore it at my peril.
Tip #2: Stitch the collar down with a running stitch or a slip stitch. I attached elastics as in the instructions, but they are fussy, they don’t want to stay around the buttons. Personally, the fur collar is on during the fall and winter and off during spring. It doesn’t take that long to attach or remove (because I attached and removed it twice.) Also it lays FLAT on top of the jacket, it doesn’t curve to the inside – I did overlap it so the fur sticks out a little over the jacket edge though so you don’t see that while its worn.
The cocoon shape is a favorite detail – I used snaps but they’re optional, and that would make it much more cardi-like than jacket-like. Omit the snaps for a more coccoon cardi look.
They also have you line the pockets. This is brilliant and I will forever more make all patch pockets this way. Why? The pocket is sewn to the lining and the turning point is inside the pocket at the folded over pocket edge, plus it’s way easier to SEW around a corner than it is to PRESS under around one.
Cut your actual size. Between the 2017 cut and the 2020 sew, I put on some pandemic pounds (didn’t we all?) Mine showed up in the fall of 2020 and as such, the cardi, while it fit, wasn’t quite as slouchy. I will sew a size up on this next one and then when I lose the weight (I’ve already lost a few pounds), it’ll be delightfully slouchy.
Styling tips: Wear with wider leg pants!
These are gorgeous with wider leg pants. For an elastic-waist woven fabric wide leg, try the Hot Patterns Deauville pant, for a knit, definitely the Hot Patterns Palazzo pant (although you can make these with woven bottom and knit waistband too.) For a crisp woven pant, try the Mainsail pant, if you’re going back to fixed waist pants. Or go totally slouchy with the Marrakesch Xpress drawstring pant for woven fabric. Of course, you can wear it with boyfriend jeans, too, but the belted cardi over wide leg pants, mmmm, gorgeous.
Wear with a slim tee or turtleneck. I chose a turtleneck from my stash but there are a LOT of tee shirt patterns in the HotPatterns lineup. Nothing too voluminous though, this cardi needs something slim under it.
My next one will be in a sweater knit with fur collar, and I intend to make a gilet with the fur collar too. A gilet would be perfect for the not-quite-enough fabric piece for a cardi that often happens. I buy extra fabric, but it’s often not enough for the length one needs with sleeves. Also, a gilet without the collar for summer in a lightweight knit would be a great top layer – I have a similar sweater that I wear All. The. Time. Looks fabulous with linen pants and a tank top.
Why make three of them? See my Make Three article here! I wax poetic about the magic of making something three times.


